How to take screenshots on Linux? Or in an Ubuntu system? If you don’t know the answer, this article on capturing a screenshot on Linux or Ubuntu is for you. It is extremely easy to print screen on these platforms or any others which have Linux as the root OS. To take a picture of your screen in Linux, just follow the simple steps given below based on your requirements. We will list them under different sections that you can use to take a screenshot in Ubuntu or Linux. Have a look.
We will also share a few Linux screenshot tools for you. This will help you to easily grab the best screenshots from your PC. Without explaining too much, let’s directly dive into the methods for printing screen on Linux or Ubuntu.
How to Take a Screenshot on Linux or Ubuntu

Here, we will list the methods for taking screenshots in Linux as well as its child operating systems such as GNOME, Ubuntu, etc. So, be sure to confirm the correct method that fits your computer before proceeding.
How to Take a Screenshot in Ubuntu (GNOME)
- Go to the main menu of Ubuntu.
- Navigate to Applications > Accessories > Take Screenshot.
- And use the tool for the purpose.
You could utilize the tool for different kinds of screenshots such as full screen, window, selected area, etc. In addition, the tool also lets you control certain features.
How to Capture Screenshot in Ubuntu using PrintScreen Button
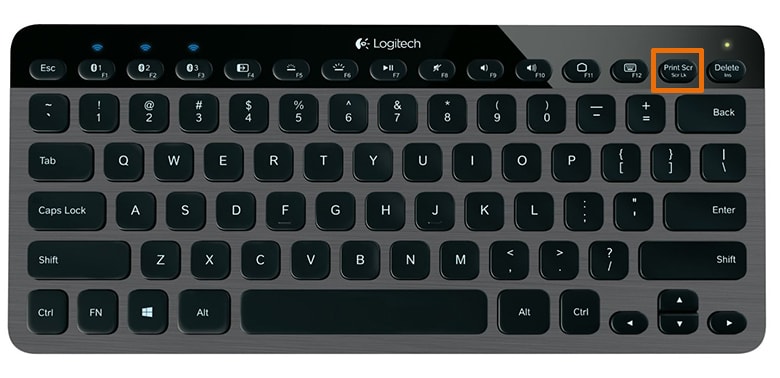
Like in Windows, you could simply use the “PrtScn” button on your keyboard for taking screenshots in Ubuntu/GNOME. Pressing “Alt+PrtScn” buttons together will help you to take a screenshot of a particular window. Like the same, pressing “Shift+PrtScn” will let you capture a selected area of your screen. After pressing these shortcuts, the OS will display a window where you can choose the location and name to save the captured screenshot.
Print Screen using GIMP in Ubuntu
We are assuming that you already have the GIMP image editor installed in your Ubuntu OS. If not, go to the Software Center from your menu and search for “GIMP.” Then download and install it by following the on-screen instructions.
- Open GIMP.
- Navigate to File > Create > Screenshot.
- Now a window will open up that will let you take screenshots in Ubuntu.
- Select the appropriate screenshot mode and set other configurations if necessary.
- Now, click the “Snap” button.
- The screenshot will be now put on your GIMP interface where you could make any changes to it.
- After making the necessary tweaks, save it by going to File > Export.
Take Screenshot using ImageMagick
ImageMagick is a command-line utility that lets you take screenshots using simple commands. Many of the Linux distributions come with this feature built-in. If you don’t have it already installed, just using this code in the Terminal will install it on your system.
sudo apt-get install imagemagickIf the administrator password is asked, just provide it and press “Enter.” Don’t worry if you don’t know the ImageMagick is installed or not. If it is already there, Ubuntu will let you know in the Terminal.
After installing it, use the following commands in order to take different screenshots as listed below.
- To take a screenshot of an entire screen: Type import -window root Pictures/fileName.png and press enter.
- To take the screenshot of a selected window: Type import Pictures/fileName.png and press enter. The browser will turn into a crosshair which you could use for clicking on the window that you want to capture.
The above lines of code just instructed the Ubuntu system to capture a screenshot of the screen and save it in the “Pictures” folder with the name “filename.png”. You could change the file name to whatever you want.
How to take a screenshot in Linux with Scrot
Scrot is nothing different from a usual terminal-based application that lets you take screenshots in Linux. To install it in your OS just type sudo aptitude install scrot in the Terminal and press enter. After installing it, you can start taking screenshots by using the command scrot MyScreenshot.png. You could also use your own file names.
Here is a video explaining the process –
Screenshot in Linux with the GNOME Panel screenshot
If you are on GNOME, you could simply use the gnome-panel-screenshot command to simply take a screenshot in GNOME. You can also control numerous options by tweaking the command. Just Google it.
Capture the Ubuntu screen using Shutter
The Shutter is one of the best-advanced screen capture tools available for the Linux distributions. It has many features that the basic tools missed. If you don’t already have this program installed on your computer, just type sudo add-apt-repository ppa:shutter/ppa in the Terminal and press enter. Then type sudo apt-get update for updating the repository. Finally, type sudo apt-get install shutter and press enter. That’s it, now you have successfully installed Shutter in your Ubuntu. Now, follow these steps to capture screen in Ubuntu using Shutter.
- Open Shutter.
- There you can see all the options for printing Ubuntu screen.
- Select the appropriate capture mode.
- If you selected the “Desktop” mode, the screenshot will be saved automatically to the “Pictures” folder. If you selected a selected area, a crosshair will open for selecting the area.
- You could also edit the screenshot by clicking the “Edit” button at the top right corner of the preview window.
- After editing completes, export it to any location as you want.
Best tools to capture screenshot on Linux
As already mentioned, there are numerous screenshot tools available for taking screenshots in Ubuntu/Linux operating systems. We listed some of them below sorted according to their relevance. Visit the given websites and install them on your PC.
Edit Your Screenshot on Ubuntu
Once you capture the screenshot, you might want to edit it. As Ubuntu doesn’t provide any default tools to edit screenshots, you may use one of these.
Flameshot
Sometimes, the screenshot captures too much. A screenshot captures our whole screen. So, even if we want to take a screenshot of a small part of the screen, we have to capture our entire screen. And if you are like most, you would not want others to know all about what is on your device while sharing a screenshot. But this problem can be fixed by using Flameshot. This tool is all you need to edit your screenshot and make it much more useful. Whether you want to blur a part of your image or crop it, you can do it easily on Flameshot.
It is one of the most impressive tools you can find for taking screenshots. A lot of people do not focus on editing the screenshots, but one should know screenshots can reveal much more than we would like them to. You can blur, annotate, mark, and upload your screenshot to Imgur by using it. But how to install it? You can install Flameshot by following their installation instructions.
But installing it alone will not give you the perks of using it. You will have to configure it as well.
One of the easiest ways of taking screenshots using flameshot is by using the PrtSc key, and to do that, you will have to assign this key shortcut. To do that, follow these steps:
- Go into your system settings and look for the Keyboard settings section.
- Once you’re there, you’ll notice a list of all the keyboard shortcuts. Scroll down to the bottom of the list. There, you’ll see a “+” button.
- Click the “+” button to add a custom shortcut. You’ll see a few fields pop up that you need to fill in. For the “Name” field, you can type in anything you want. For the “Command” field, input /usr/bin/flameshot gui.
- At the end, set the shortcut to your PrtSc key. You will see a warning that the default screenshot settings have been disabled. And now you will be able to take the screenshot using this key.
Shutter
If Flameshot is too hectic for you to use or you think it is too technical to install and configure, a much easier tool called Shutter is available for taking screenshots on Linux. It is another awesome screenshot-taking tool that helps you manage your screenshots effectively.
Although is great and simpler to use as compared to Flameshot, there are some issues you might face while using it. For example, the default editing feature is disabled on this tool, so you will have to work on it a little bit. But once you fix it, you will not find many tools better than this one.
Conclusion
A lot of us rely on default features on our devices to take screenshots, but they provide too limited features. A screenshot is not just a part of our screen, but it is also our privacy. Do not share any information that you think you do not need to. Install the screenshot-taking tools that allow you to edit your screenshots so that your privacy remains safe.
The most commonly asked questions
Here are some of the most searched queries on the Linux screenshot. It might help you to quickly find the answer to some of your questions.
How to Screenshot on Linux Mint?
The steps are the same in the Linux Mint operating system too. Nothing different should be done for getting the complete screenshot of your screen or the partial portions. You could simply utilize numerous 3rd party applications too for the purpose.
How to screen capture a video on Ubuntu/Linux?
Here are some of the videos for taking screenshots in Linux or Ubuntu which might help you in the process.
What is the Ubuntu screenshot shortcut?
If you mean the shortcuts to take screenshot in Ubuntu, there is nothing better than simply using the “Print Screen” button. It is the simplest way for printing the screen on your Linux distributions. However, in some OS such as the basis Linux, the shortcut may not work as expected. So, in such situations, you could easily depend on the provided commands or some extra utilities for taking, editing, and exporting screenshots in your Linux.
So, that’s how you can take a screenshot on Linux or Ubuntu.